Alocasia polly isn’t the absolute easiest plant to master, but it’s not impossible! Learn about alocasia polly care, including how much light the plant needs, what the ideal humidity levels are, and how to keep those pesky spider mites at bay!
Looking for alocasia polly care info? Let’s talk about it!
Hello hello! Today I am writing about what is probably my favorite alocasia plant: alocasia polly, also referred to as alocasia amazonica and sometimes the “African mask plant.” I believe this was the first alocasia plant I ever got.
In my research for this post, I found conflicting accounts of where this plant comes from. It’s pretty clear that it is a hybrid variety, meaning it was creating from two different alocasia parent plants. Some sources say the parent plants are unknown.
However, other sources say that alocasia polly was cultivated as a hybrid of alocasia longiloba and alocasia sanderiana. Regardless, it wasn’t a spontaneous creation in nature. And the parent plants are probably native to Southeast Asia.
Plant experts also think that the name “amazonica” comes from its creator, Salvadore Mauro, in the 1950s. That’s because he created the hybrid in his Florida nursery, which was called “Amazon Nursery.” The Missouri Botanical Garden notes that he never registered the hybrid name “amazonica” or “polly.”

What does an alocasia polly look like?
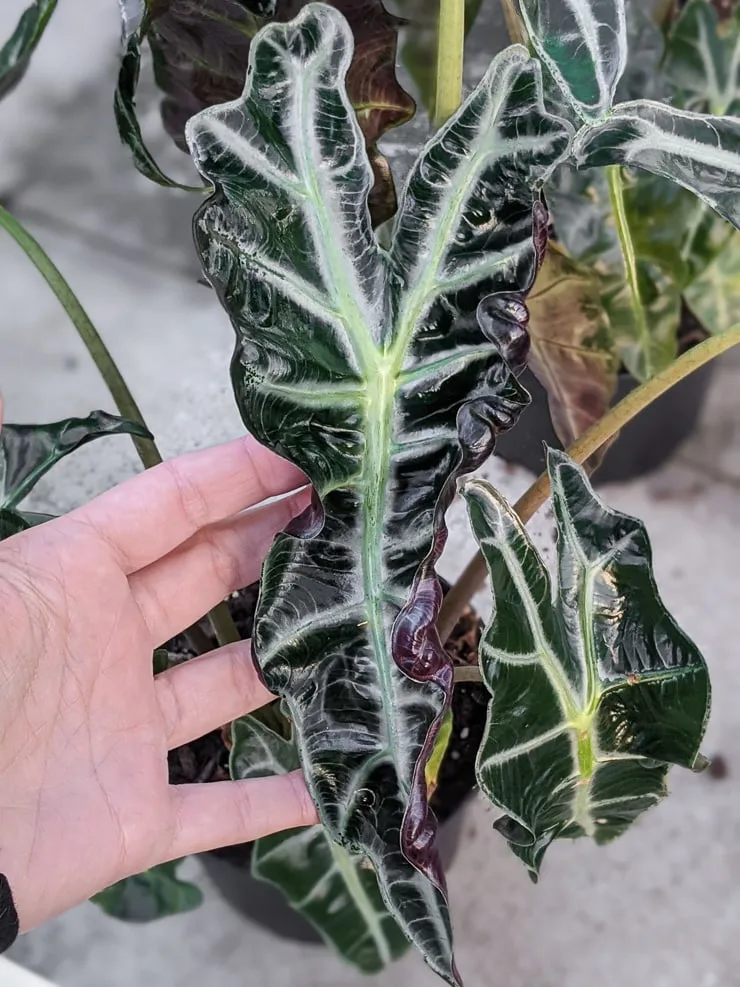
It is stunning. That’s what it looks like! It has jaw-dropping thick, green, wavy leaves with bright white veining. The leaves themselves can grow to be nearly a foot and a half long; the plant as a whole grows to be about 24 inches tall and can spread out about 24 inches wide.
And unlike some other alocasia and elephant ear plants, alocasia polly has very pointy leaves. They can be large and somewhat narrow, giving them an arrowhead look. Or they can be a bit wider. The stems sprout from tuberous rhizomes under the soil.

Alocasia bambino vs. polly
You might see a plant labeled alocasia bambino at your local nursery and think, hmmm…this looks a lot like an alocasia polly/amazonica! Well, that’s because it is a lot like it.
An alocasia bambino is a dwarf version of the polly. It stays smaller, growing to be only about a foot tall. That leaves also stay smaller, too. And in my experience, the leaves have less rippling.
Alocasia African mask vs. polly
And as I mentioned before, if you see a plant that looks like the one in this post and it is labeled “African mask plant,” it’s almost certainly an alocasia polly. “African mask plant” seems to be falling out of style, and I haven’t see it labeled as such at my local nurseries lately.

How much light does alocasia polly need?
Alocasia polly plants do best in bright, indirect light. They do not tolerate extremes, whether low light or direct light. Low or even medium light levels will likely lead the plant to suffer. Direct light can burn the leaves.
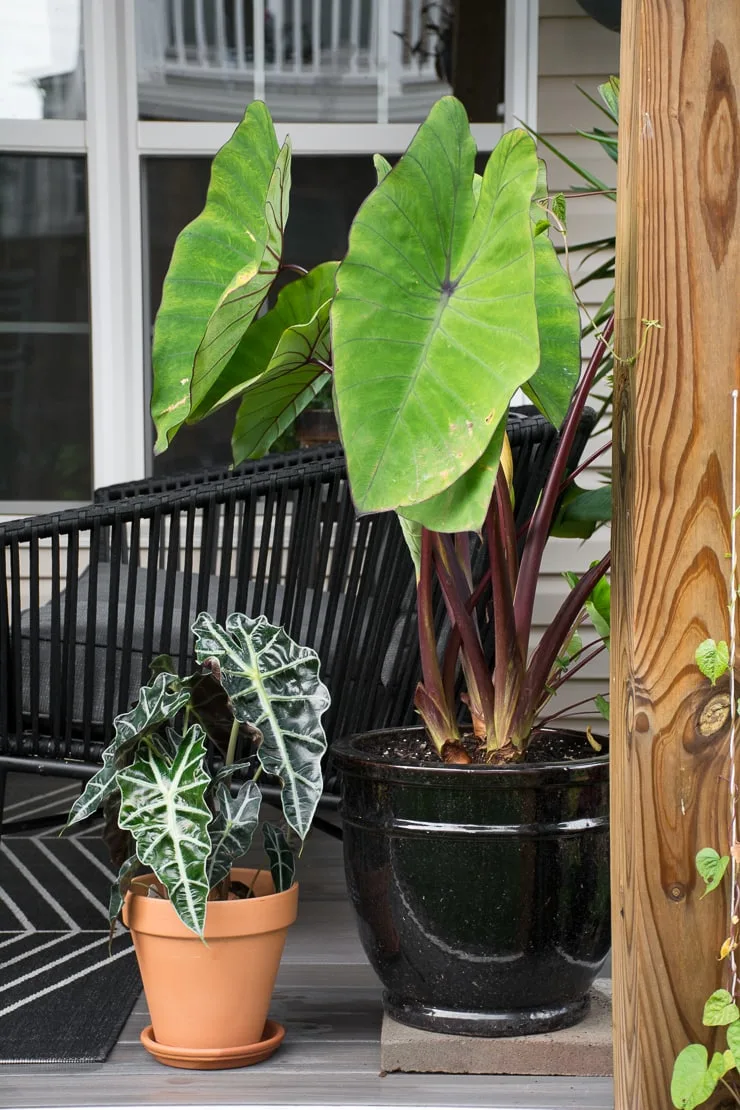
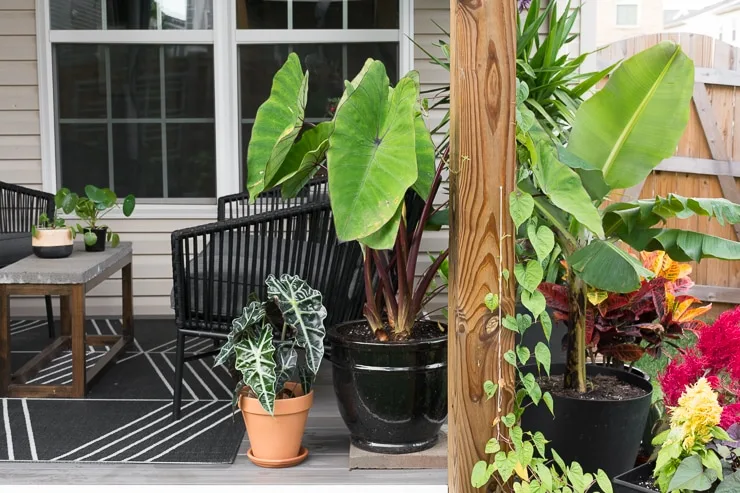
However! I have had an alocasia polly in very bright direct sun during the peak of the summer. And it did great! But that’s probably because I put it out very early in the season, and it gradually built up a tolerate as the sun got more intense and the days got longer.
Just my personal experience, though. See below—it got direct sun all afternoon and into the evening.

Alocasia polly care: Water & soil needs
Alocasia polly is slightly demanding with its watering needs. That’s because it enjoys soil that stays consistently moist but not soaking wet. A key to this balance is having the right soil.
A well-draining soil with plenty of coco coir will help you maintain this balance. (Coco coir is a great peat moss alternative, and it’s very economical to buy in bricks!) I like to buy a houseplant mix that comes pre-mixed with additives to enhance drainage and aeration.
Then I throw in a few handfuls of coco coir and coarse perlite for good measure. The coco coir is excellent for retaining water without being too heavy, and the perlite helps with facilitating drainage and aeration.
Together, they ensure that you don’t overwater your plant. A very well-draining mix will dry out fast, though, especially in the summer heat. So the best rule of thumb is to water your alocasia polly when the top inch or so of soil is dry.
It is not very forgiving if you forget to water it. And if the soil is too dense or you keep the soil too wet, the plant will likely develop root rot and die.

Want more alocasia? Check out my Alocasia Black Velvet Care guide, my Alocasia Dragon Scale Care guide, and my Alocasia Silver Dragon Care guide!
How much humidity does an alocasia need?
A ton of humidity and then some. Seriously. This is the hardest part of alocasia polly care for me. I have had alocasia polly plants indoors, and they are never happy. My last townhouse was so dry, and it led to a whole host of problems. Don’t buy this plant if you want to keep it in your dry house 🙂
However! Do buy this plant if you are fine investing in a humidifier. I don’t think misting or a pebble tray will do the trick, but you can try it. (Misting is also good for repelling spider mites—more in that in a bit.)
You could also consider a glass greenhouse cabinet like my Ikea greenhouse cabinet, though to keep humidity extra high, you’ll likely need to seal the air leaks around the cabinet with weather stripping.
Because I’m lazy when it comes to alocasia plants and their humidity needs, I usually do one of a few things over the long winter (because these plants are NOT cold or frost tolerant, so they need to come inside):
- Wait for the plant to throw a fit that leads all of the foliage to die, at which point I cut the stems down to the soil line, give it some water every month or so, and wait for the plant to resprout in the spring.
- Harvest the bulbs and replant them in the spring.
- Mist the plant’s leaves, keep it in a bathroom for extra humidity, and pray it gets to spring.
For my lifestyle, I like to have alocasia outdoors. They are SO low maintenance outdoors where I live since it gets so humid. They grow like weeds! So I try to enjoy them through the spring, summer, and early fall knowing that the winter probably will just make me sad.

Growth rate, fertilizer needs, & repotting
If the plant is happy, it is a really fast grower! Outdoors on my covered patio, my alocasia polly threw out leaves left and right two summers ago. It got so lush. But the growth rate will slow down if conditions aren’t ideal.
If you notice that your plant is beginning to grow roots out of the pot’s drainage holes, it’s probably time to repot it and size up an inch or two. Use fresh soil, and the plant will quickly expand to fill the extra space.
Don’t freak out if the bottom-most leaves tend to yellow and die off. If they are older leaves and they are generally keeping pace with new growth, I just chalk it up to the plant sacrificing itself. My alocasia regal shield was similar. Last year it would kill off one old leaf for every two or so new leaves it pushed out.
During the spring, summer, and early fall, you can feed the plant with a bit of diluted houseplant fertilizer. This year I’m using Liqui-Dirt instead of a chemical fertilizer, and in the past I’ve used worm castings to add nutrients into the soil.

Issues you might encounter
I don’t want to sound too grim here, but there are some things you definitely need to be on the lookout for on your alocasia polly care journey. And they can kill a plant quickly. So I’ll categorize them by symptoms you can monitor for if you’re trying to diagnose a problem.
1. Alocasia polly developing brown spots or stems drooping
If your alocasia polly is developing brown spots on the otherwise striking leaves, it can be due to a number of things. If the brown spots are somewhat mushy, I’d check to make sure you are not overwatering the plant or that the soil is not too dense.
Mushy brown spots on the leaves and droopy stems can be a sign of root rot. The brown spots will spread until the entire leaf dies off. You can stop root rot before it kills the entire plant by backing way off the watering and repotting the plant into a more suitable soil.
Here is an example of a clearance shelf alocasia polly I tried to rescue from Walmart. (I’m a sucker, what can I say.) It was extremely overwatered, and when I got it home to take it out of the soil, I saw how mushy the roots were.
I was ultimately not able to save this plant, but it was at least a good exercise in seeing what root rot can do to an alocasia polly!
If the brown spots aren’t spreading and you aren’t overwatering, it could also possibly be a fungal issues.


2. Yellowing alocasia polly leaves & droopy stems
If your alocasia polly leaves are yellowing slowly, one by one, and drooping a bit, you’re probably overwatering the plant. This could either be because you are watering it too frequently or because the soil is too dense.
I find it is next to impossible to keep an alocasia polly from developing some yellow leaves, though. Even with perfect care, the plant can still develop yellowing leaves that it kills off as it unfurls new growth. If the plant is otherwise happy and the leaves aren’t yellowing often, trim the yellow off and chalk it up to the circle of life.
3. Yellowing or browning leaves accompanied by fine webbing
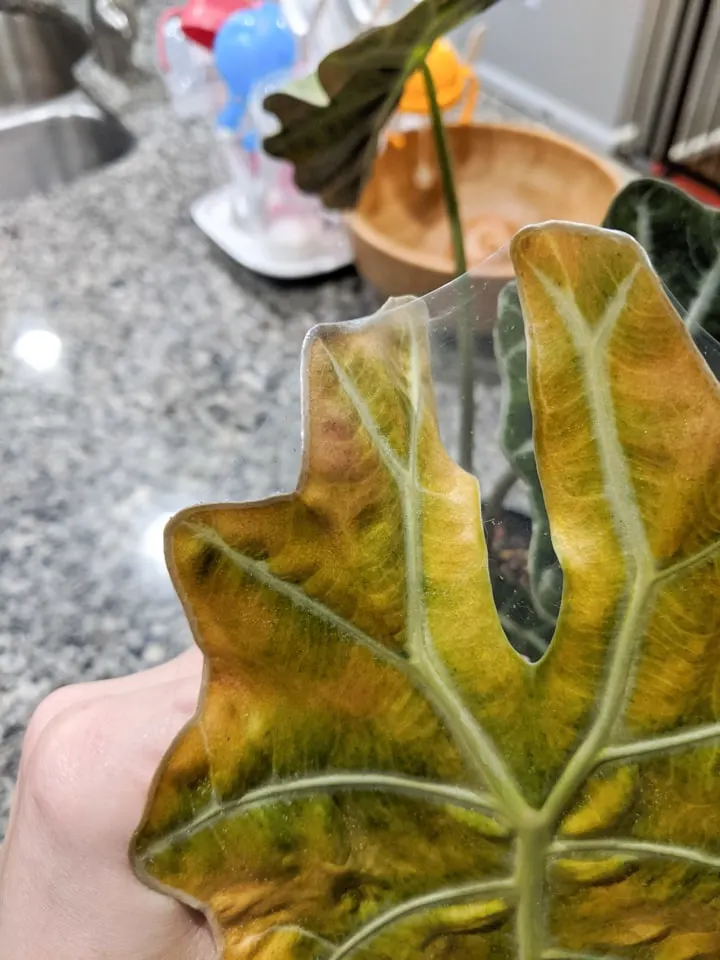
If you notice discoloration on your polly’s leaves—yellow spotting that seems to spread across the leaf and turn to brown—and it is accompanied by webbing…well, I’m sorry to say you have spider mites. You can’t save the leaves they’ve already infested, but you can hopefully save the rest of the plant!
Spider mites are almost a right of passage with alocasia polly care. I had a wicked infestation on my first polly. I didn’t notice it for a while, so it went pretty nuts. Here’s what the plant looked like when I went to check on it (it was winter so I was watering very infrequently). One dead browning leaf and one leaf that had the start of yellow spotting.


When I realized the discoloration was accompanied by a very fine webbing around the perimeter of the leaves and where the stem meets the leaves, I had my diagnosis: spider mites. These little assholes will move in and suck the life out of your plant—literally.
They are teeny tiny, and you can see them crawling on your plant’s leaves only if you look closely. Usually when you see their webbing, you’re too late. But you can still treat the plant with a storebought insecticide spray and hope for the best.
This alocasia polly was beyond saving, so I trimmed it down to the soil line, treated the plant with insecticide, and waiting until spring for the plant to resprout.
I never have problems with spider mites outdoors, only indoors. They are a NIGHTMARE for alocasia plants in the winter. That’s because alocasia plants are very prone to spider mite infestations (they must be delicious), and spider mites like warm, dry conditions. AKA—your house in the winter.
This is why misting foliage regularly with cool water can help deter spider mites from moving in. But, again, alocasia plants have been a real pain for me with spider mites. The only alocasia I’ve had make it through an entire winter without mites was a tiny baby one I had in a tight plastic bag to keep humidity high.


4. Alocasia polly leaves curling up
Despite my troubles with browning, yellowing, spider mites, and just about every other freaking thing that can go wrong with an alocasia polly plant, I have not dealt much with my alocasia polly’s leaves curling up.
However, if you notice that you have a problem with alocasia leaf curling, it is likely because the plant is getting too much direct light or too little humidity. Try changing one variable at a time to pinpoint the source of the issue.
Is alocasia polly safe for pets?
No, alocasia polly is not the best plant to have around pets or small children who are prone to having a nibble. I mean, it’s fine to be around the plant. But if you or an animal ingests part of the plant, it will be toxic.
The toxicity is from something called calcium oxalate crystals. When ingested, these can lead to irritation of the GI tract. It shouldn’t be a killer, but it sure would be a day ruiner.

How to propagate alocasia polly
Propagating alocasia polly is typically done through division. There are often multiple plants in a single pot, and you can separate them by taking the plant out of the pot and gently knocking away the soil. Then separate the plants at the tuber level, making sure you take some of the root system with you.
The nice thing about propagating by division is that the plant is ready to go. Just pot it up with some fresh soil, and it should need very little time acclimating to its new environment!